EASTER PLATE Ideas most Beautiful idea for Easter.
Showing posts with label Decorated EGGS. Show all posts
Monday, May 30, 2016
Thursday, April 18, 2013
RUBBER-BAND Easter Eggs
Yes, they are just as gorgeous as they look on the photos – especially if you manage to make the rubber band stay put (my final attempt was to secure them with a piece of masking tape – and it worked).
Wrap the boiled eggs in rubber bands before dipping them in egg dyes.
The ALIENS Who Came for EASTER
The best stories are the ones that grow on kids’ imaginations… so they keep adding to them. These are not just eggs – these are spotty aliens with plenty of eyes. They have landed on our planet to explore our strange habits of dying eggs then breaking them…
Firstly, we dyed the eggs as normal.
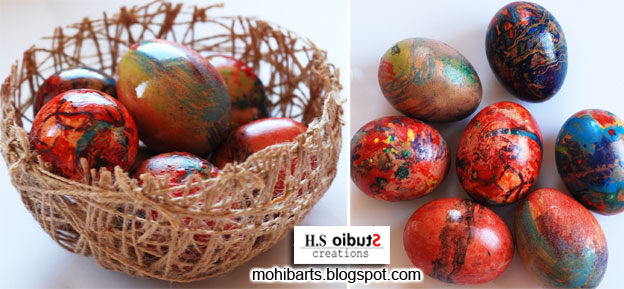
Secondly, we dissolved some more dyes but instead of adding vinegar, we added a spoonful of vegetable oil and mixed well. We dipped the eggs in the mixture, alternating between different colors. Sometimes even darker eggs get covered in lighter stains and spots!
Look at the illustrous eggs we got! We finished them off by adding googly eyes and drawing a mouth in permanent marker.
The EGG That Never FALLS
This egg may tumble but will not fall. When you put it on a flat surface and you push it with your hand, it will sway this way and that, but will always get upright again. Like the Russian Roly Poly dolls (неваляшки)
There’s a bit of plasticine stuck at the bottom of the egg. It is what makes the egg always go back to its initial position.
We made this project, inspired by the book “Scientific Experiments and Art Projects” published by Fuit.
Break an egg in two on the edge of a plastic bowl and carefully pour its contents out. Wash the two parts of the shell well and dry them. Glue a piece of plasticine inside the lower part. Wait for the glue to dry.
Put glue at the end of the shell. Glue the two halves well, trying to make them fit together well.
When you have glued back the egg, use torn paper napkins and diluted PVA glue to cover the whole egg. When everything is dry again, you can decorate your tumbling egg with felt-tip pens
Using NATURAL DYES
Тhis year I tried dying my eggs with natural dyes, too… but it didn’t turn out very well. That’s why I was so glad to read Rumi’s post at Something… and her advice on using natural dyes:
The results were very nice and I’ll tell you what I learned.
The first and major condition is using white eggs. The colors you will get from using natural dyes are rather pale. I think that if you use brown eggs, everything will turn out quite muddled.
WAX PASTEL Technique
While you’re dying the eggs with liquid dyes, you can safely let your kid have fun with wax pastels. The eggs for this technique should be warm but not hot The heat makes the pastels softer and really very nice to work with. It is a little messy but it’s well worth it. You can scrape a little pastel on the eggs for raised patterns.
I saw this technique here and really liked it (I don’t know whether the wax pastels are particularly safe but the eggs are certainly splendid). To make the bowl, I cut in two one of the ornaments I made this winter
Subscribe to:
Posts (Atom)