
A couple of decades ago when the Internet was still in its infancy, we would have found it hard to imagine that the new digital, technological age would be instrumental in securing the future of more traditional hand crafts skills. I’m sure I’m not alone in admitting that the inspiration I get from reading craft blogs or tutorials, and seeing many entrepreneurial handmade careers succeed online, has helped me hone my own skills enormously. In fact, it almost seems that even in order to be successful offline, an online presence is essential.
If I get stuck on a sewing project (zippers usually, in case you were interested) or want to learn a new crochet stitch or even find a free pattern, the first and often only place I turn, is to my computer. And if you’d told me a few years ago that one day I’d have the opportunity to design a few of my own fabrics and sew them into unique creations, I’d probably not have believed you.
First off, as much as I’d like to be, I am not a graphic designer. I even downloaded the trial version of Illustrator but we did not get on very well with each other. The cursor always appeared at random on different areas of the screen, everywhere it seemed, except where I clicked, and though I did watch some very helpful beginner’s tutorials, I quickly realized that anything I’d be able to create would pale into comparison against the beautiful and professional looking prints available in the Spoonflower marketplace designed by people with amazing talent.
However, what I may lack in skill, I make up for with good ideas and enthusiasm, so I decided that in keeping with my interest in technology versus tradition, I would turn to a somewhat older design method than my embarrassing computer-based effort. I also decided to involve my children in this exercise because, well, they are much better artists than me.
My take on a traditional block printing method required some well-washed Styrofoam food containers, a couple of wooden skewers, paint and paper. I also found a small craft roller brush more useful than an actual paintbrush.

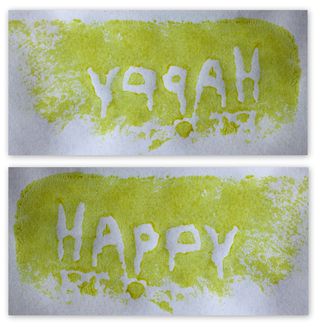
I cut the Styrofoam into pieces and had my kids use the sharp end of the skewer to etch drawings into them (larger, basic designs are more effective than ones with too much detail). When they were done, we rolled over the designs with paint and stamped them onto plain paper.

When dry, I took photos of the designs, uploaded them to my computer and edited them in my basic photo editing software, flipped around the writing and added simple frames, as well as playing around with the colors.
When my printed fabric arrived, I knew immediately what I’d use it for. What better symbol for the meeting of two worlds - the digital and the handmade - than an iPad sleeve made with a block print fabric created by my children, digitally edited, and printed just for me by the mighty Spoonflower! And until they make iPads that bounce when dropped, some sort of robust padding is essential (at least in my house).
To make your own iPad sleeve like mine:
1. Cut 4 pieces of main fabric measuring 10” x 12”
2. Cut 2 pieces of main fabric measuring 9”x 5” (for the tab)
3. Cut 2 pieces of quilt batting or felt measuring 10” x 12” (for padding)
4. With right sides together and leaving ½” seam allowance, sew two of the 10” x 12” pieces together leaving one long end open plus a 6” opening in the opposite long end. This will be your lining (inside) piece.

5. Repeat step 4 with the other two 10” x 12” pieces and also with the two felt pieces but don’t leave the opening hole. Sew all the way around 3 sides, leaving one long side open. Clip all corners and trim seam allowance to reduce bulk.
6. With right sides together, sew the two tab pieces together, leaving one long end open. Turn right way out and press. Top stitch around the 3 sewn edges of the tab.
7. Turn your outer sleeve piece right sides out. Keep your felt piece wrong sides out. Insert the felt piece into the main piece with wrong sides facing. Baste together along the long edge.
8. Pin and baste the tab piece to the outside of the main piece. Trim raw edges if necessary.
9. Keep lining wrong sides out. Insert the outer piece (with the felt insert and tab attached) into the lining with right sides facing.

10. Sew all pieces together, catching the edge of the tab in your sewing.
11. Pull outer section through the hole you left in the lining and stitch the lining hole closed, folding the raw edges inwards.
12. To finish, sew Velcro onto the tab and front of the sleeve.

I used about ½ yard of linen-cotton canvas to make one sleeve, which means that because I started with 1 yard, I have enough left to make another one-- perhaps for a gift for a doting grandparent!


No comments:
Post a Comment